E-Invoicing
The E-Invoicing Add-On extends FusionInvoice with the infrastructure required to send electronic invoices through established international networks such as PEPPOL, DBNAlliance, FACeB2B, and Finvoice (where supported). It registers your business with a certified e-invoicing access point, establishes and maintains your network identity, and securely formats and transmits invoices according to applicable standards in supported countries, including:
Europe (Austria, Belgium, Croatia, Cyprus, Czechia, Denmark, Estonia, Finland, France, Germany, Greece, Iceland, Ireland, Italy, Latvia, Lithuania, Luxembourg, Netherlands, Norway, Poland, Portugal, Romania, Spain, Sweden, Switzerland, UK, Ukraine);
Asia-Pacific (Singapore, Japan, Malaysia, Australia, New Zealand);
North America (Canada, USA, Mexico);
Others (China, India, South Africa, UAE).
The add-on is enabled through a one time purchase and annual renewal and operates on a credit-based model, with credits consumed as e-invoices are processed and expiring one year after purchase.
Setting Up E-Invoicing in FusionInvoice
Before you can send e-invoices, you must complete several configuration steps inside FusionInvoice and complete your network registration.
Follow the steps below carefully.
Step 1: Install add-on
The add-on must be installed and enabled before you can use it.
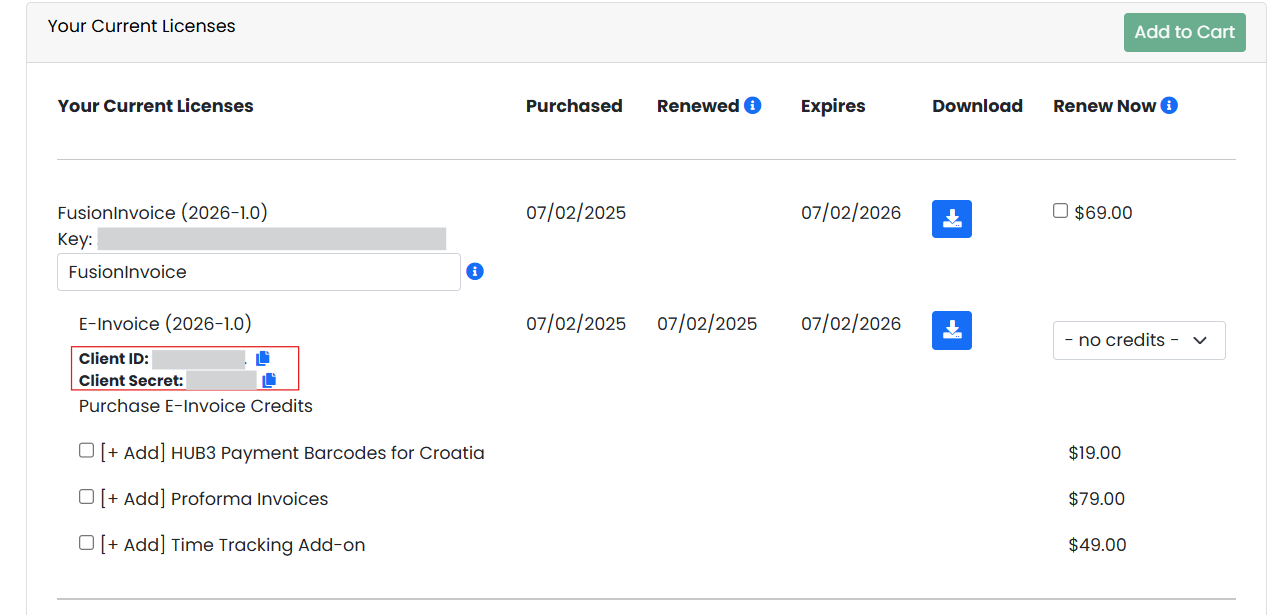
Step 2: Configure Add-on and link to E-invoicing provider
- Copy your Client Secret and Client ID from your Fusioninvoice.com account.

- Navigate to Settings>Addons and find the e-invoicing addon, click the options box to the right and choose "settings".
- Enter your Client ID and Client Secret.

- Set a rate limit (the number of invoice request per day that can be sent) and a low credit warning.
- Click Submit.

Step 3: Configure Company VAT Information
*Your VAT Schema and VAT ID must be correctly configured before your business can be registered on the e-invoicing network.*
Step 4: Complete PEPPOL Network Registration
To send e-invoices via PEPPOL (where applicable), your business must be registered on the network.
-
Choose a network, then you must create a legal entity.
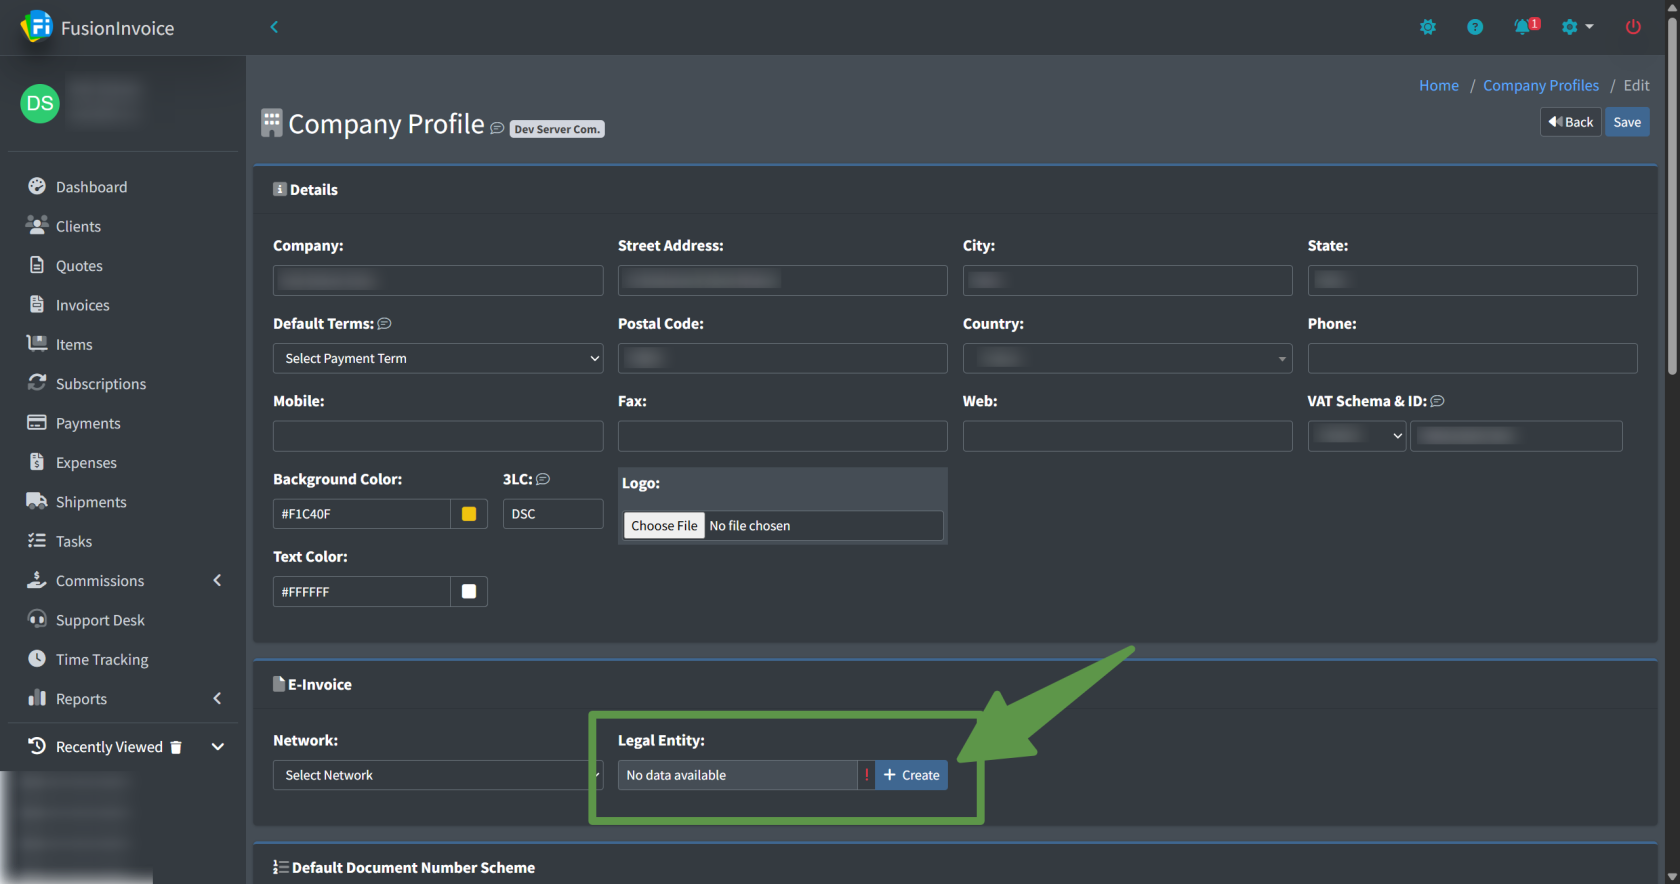

⚠️ You cannot send e-invoices until you receive approval confirmation of your PEPPOL registration.
Step 5: Configure Client VAT Information
For each client you intend to send e-invoices to:
-
Open the client record.
-
Enter the client’s:
-
VAT Schema
-
VAT ID
-
Both fields must be properly completed for e-invoice routing to succeed.
Step 5: Configure VATZERO Tax
All invoice line items must have a VAT tax applied before an invoice can be submitted as an e-invoice.
This includes invoices with zero tax. If there is no tax:
-
Create a tax named VATZERO (if it does not already exist).
-
Set the tax rate to 0%.
-
Apply this VATZERO tax to any untaxed invoice line items.
📌 Important:
Even untaxed line items must have a VAT tax applied. If no VAT tax is applied, the invoice cannot be submitted as an e-invoice.
Sending an E-Invoice
Once:
-
Company VAT information is configured
-
Client VAT information is entered
-
VATZERO tax is created
-
PEPPOL registration has been approved
You are ready to send e-invoices.
Submit an E-Invoice
-
Open the invoice you wish to send.
-
Click the Options or Actions button.
-
Select E-Invoice Submission
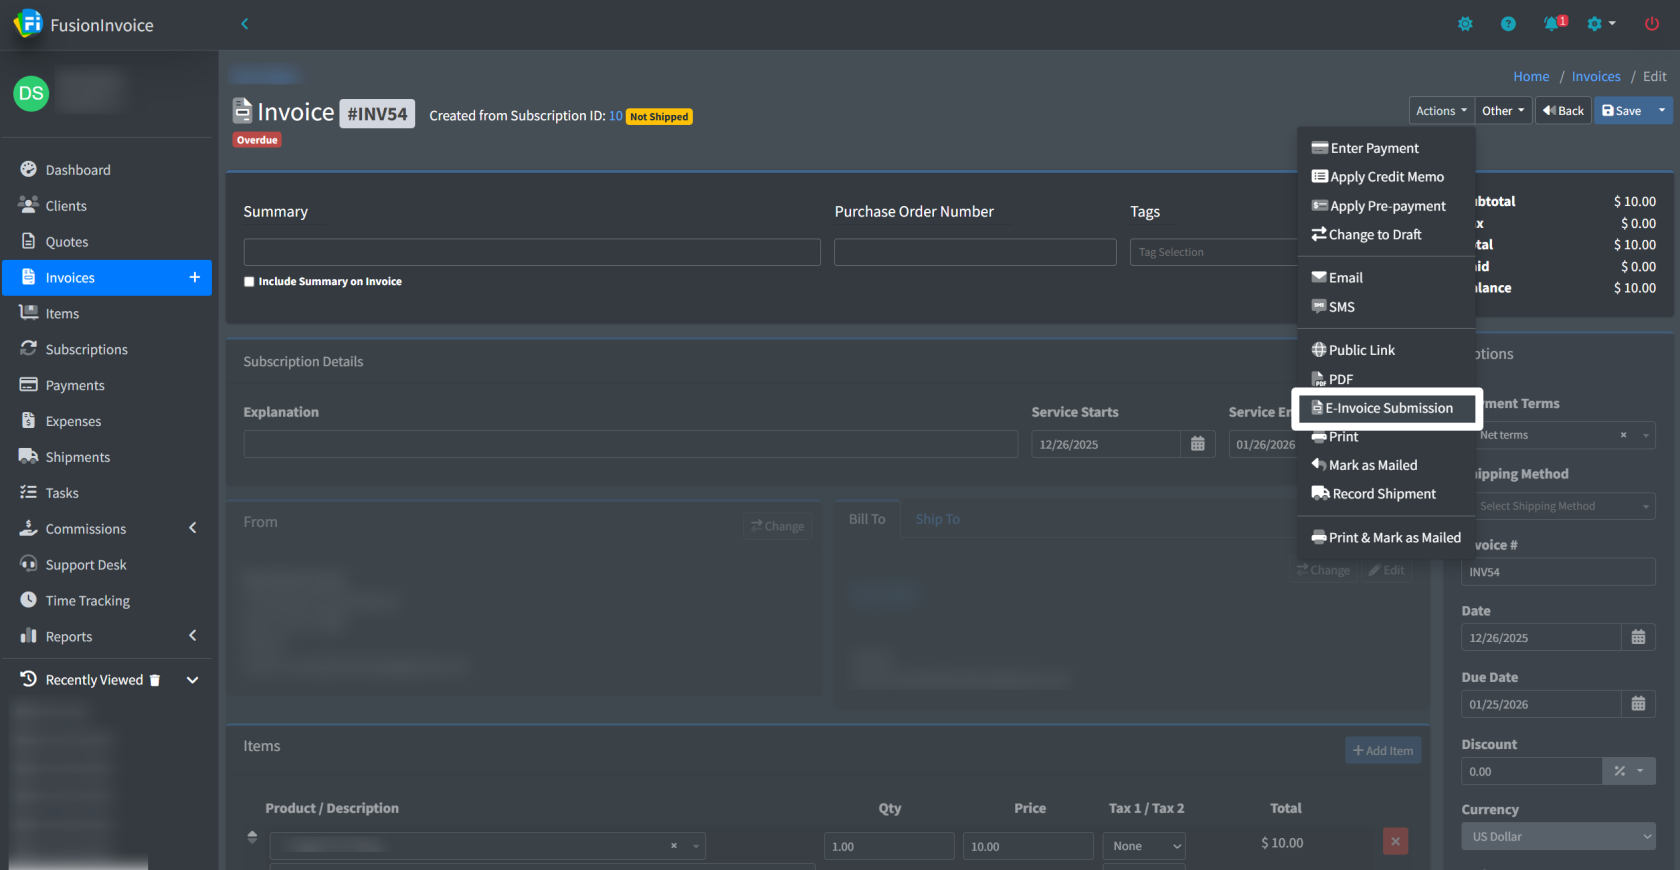

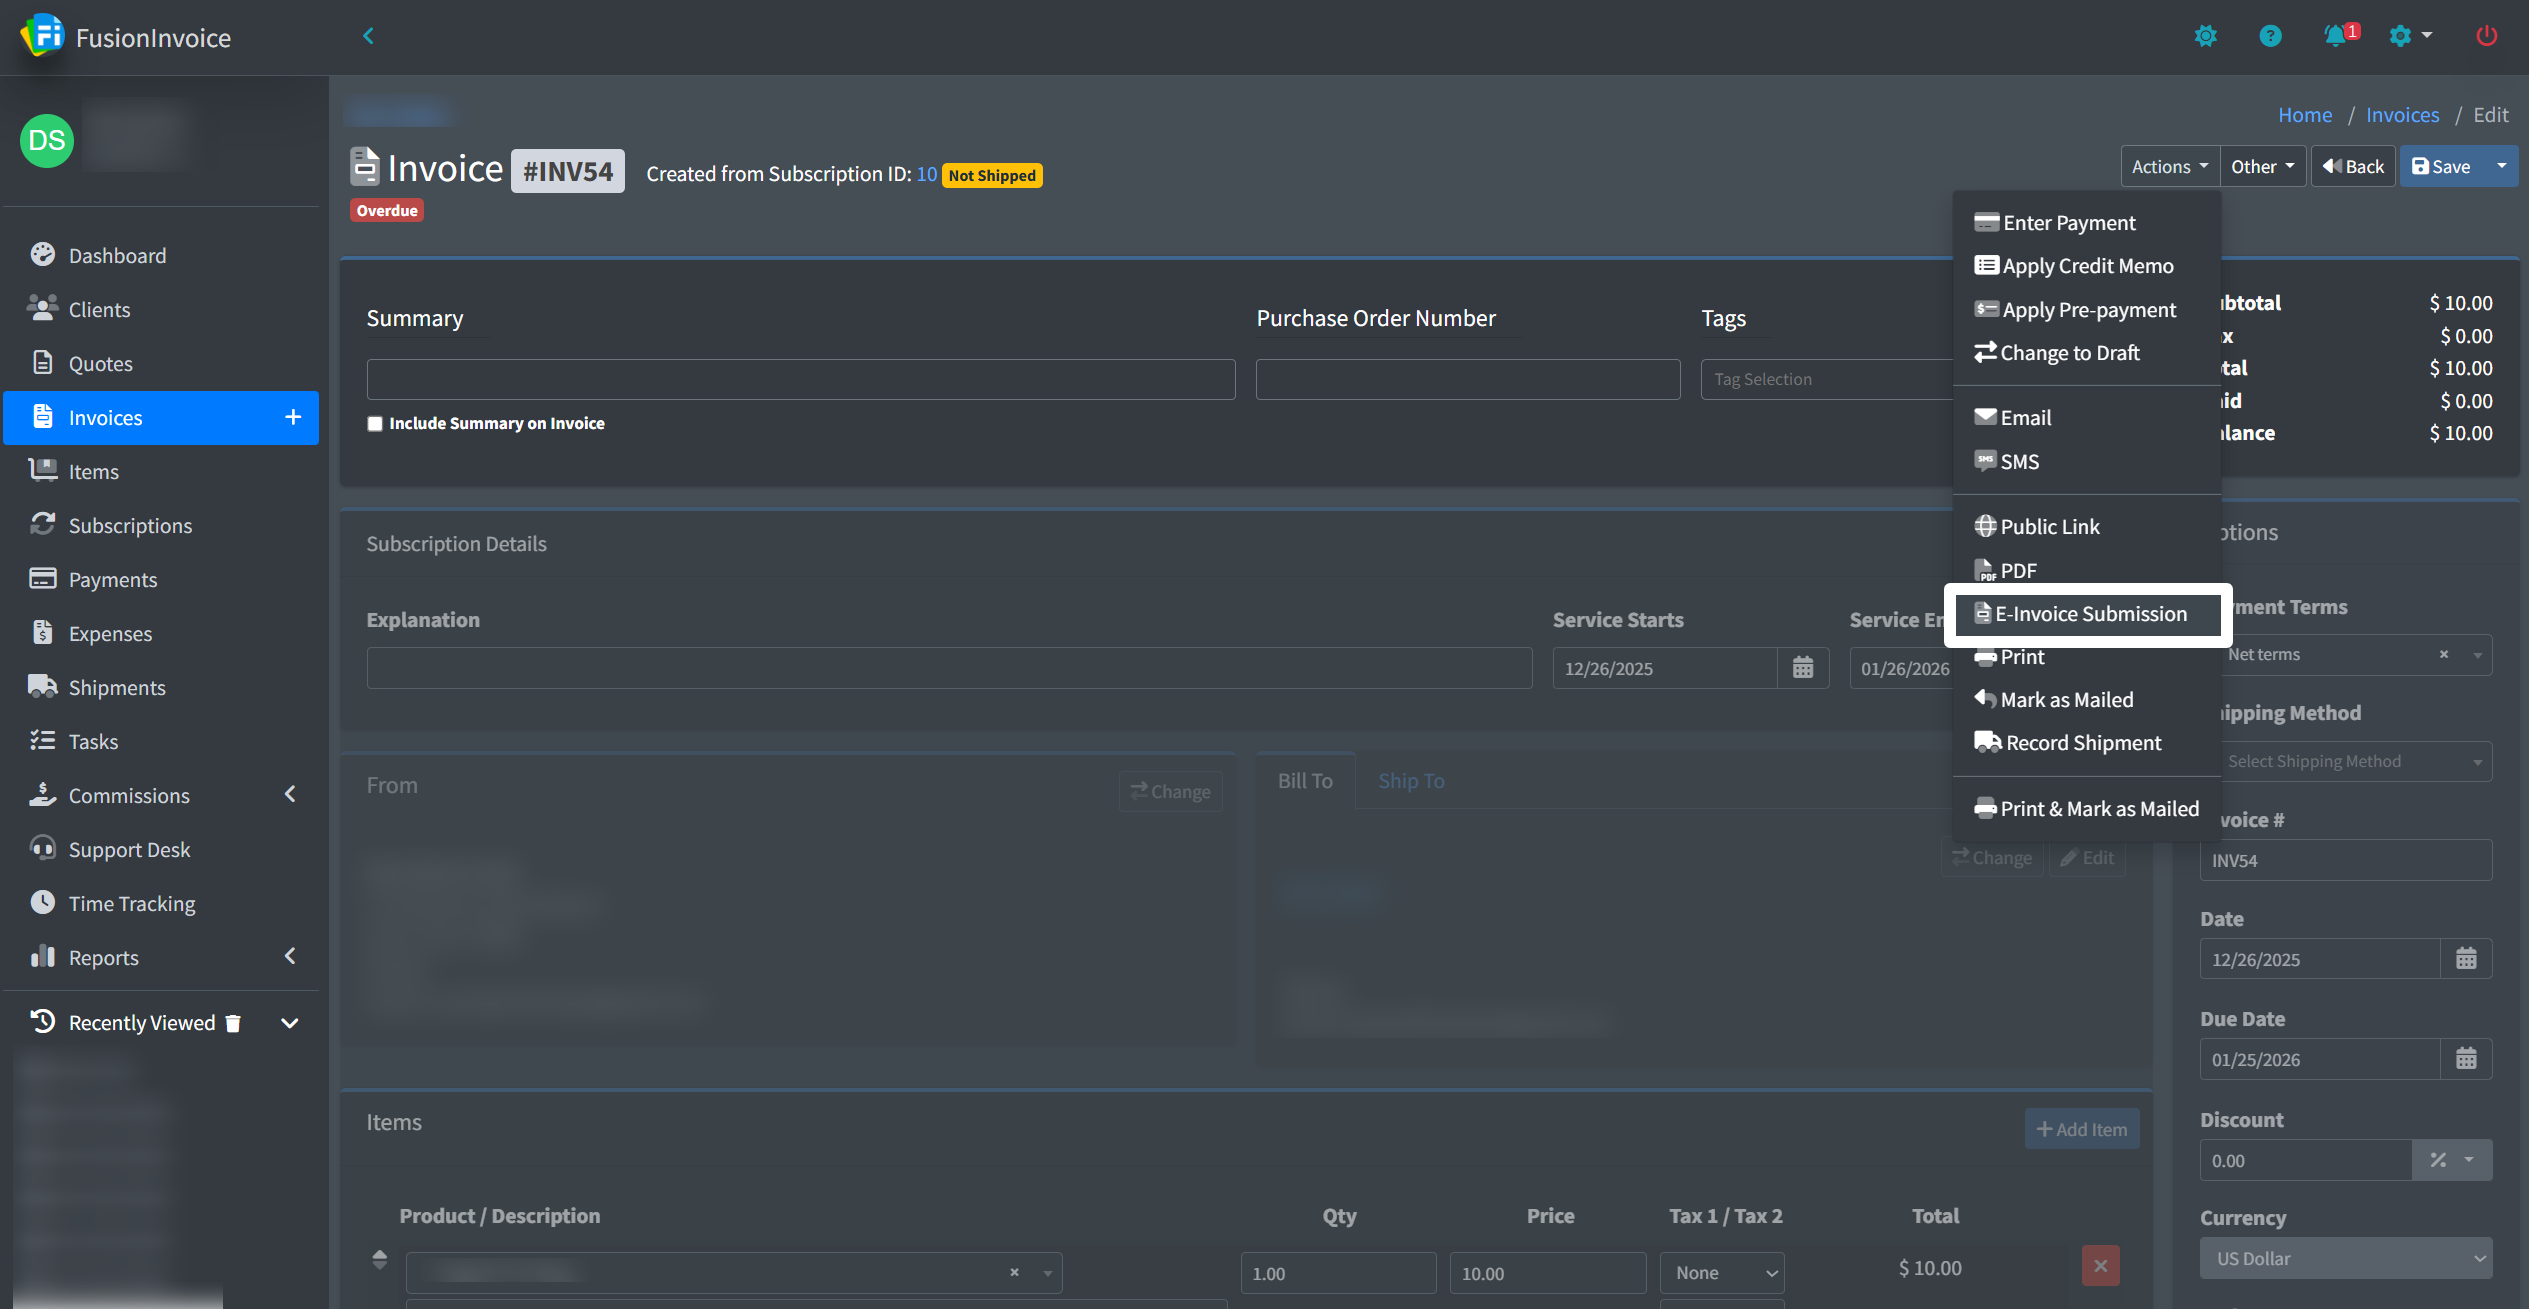
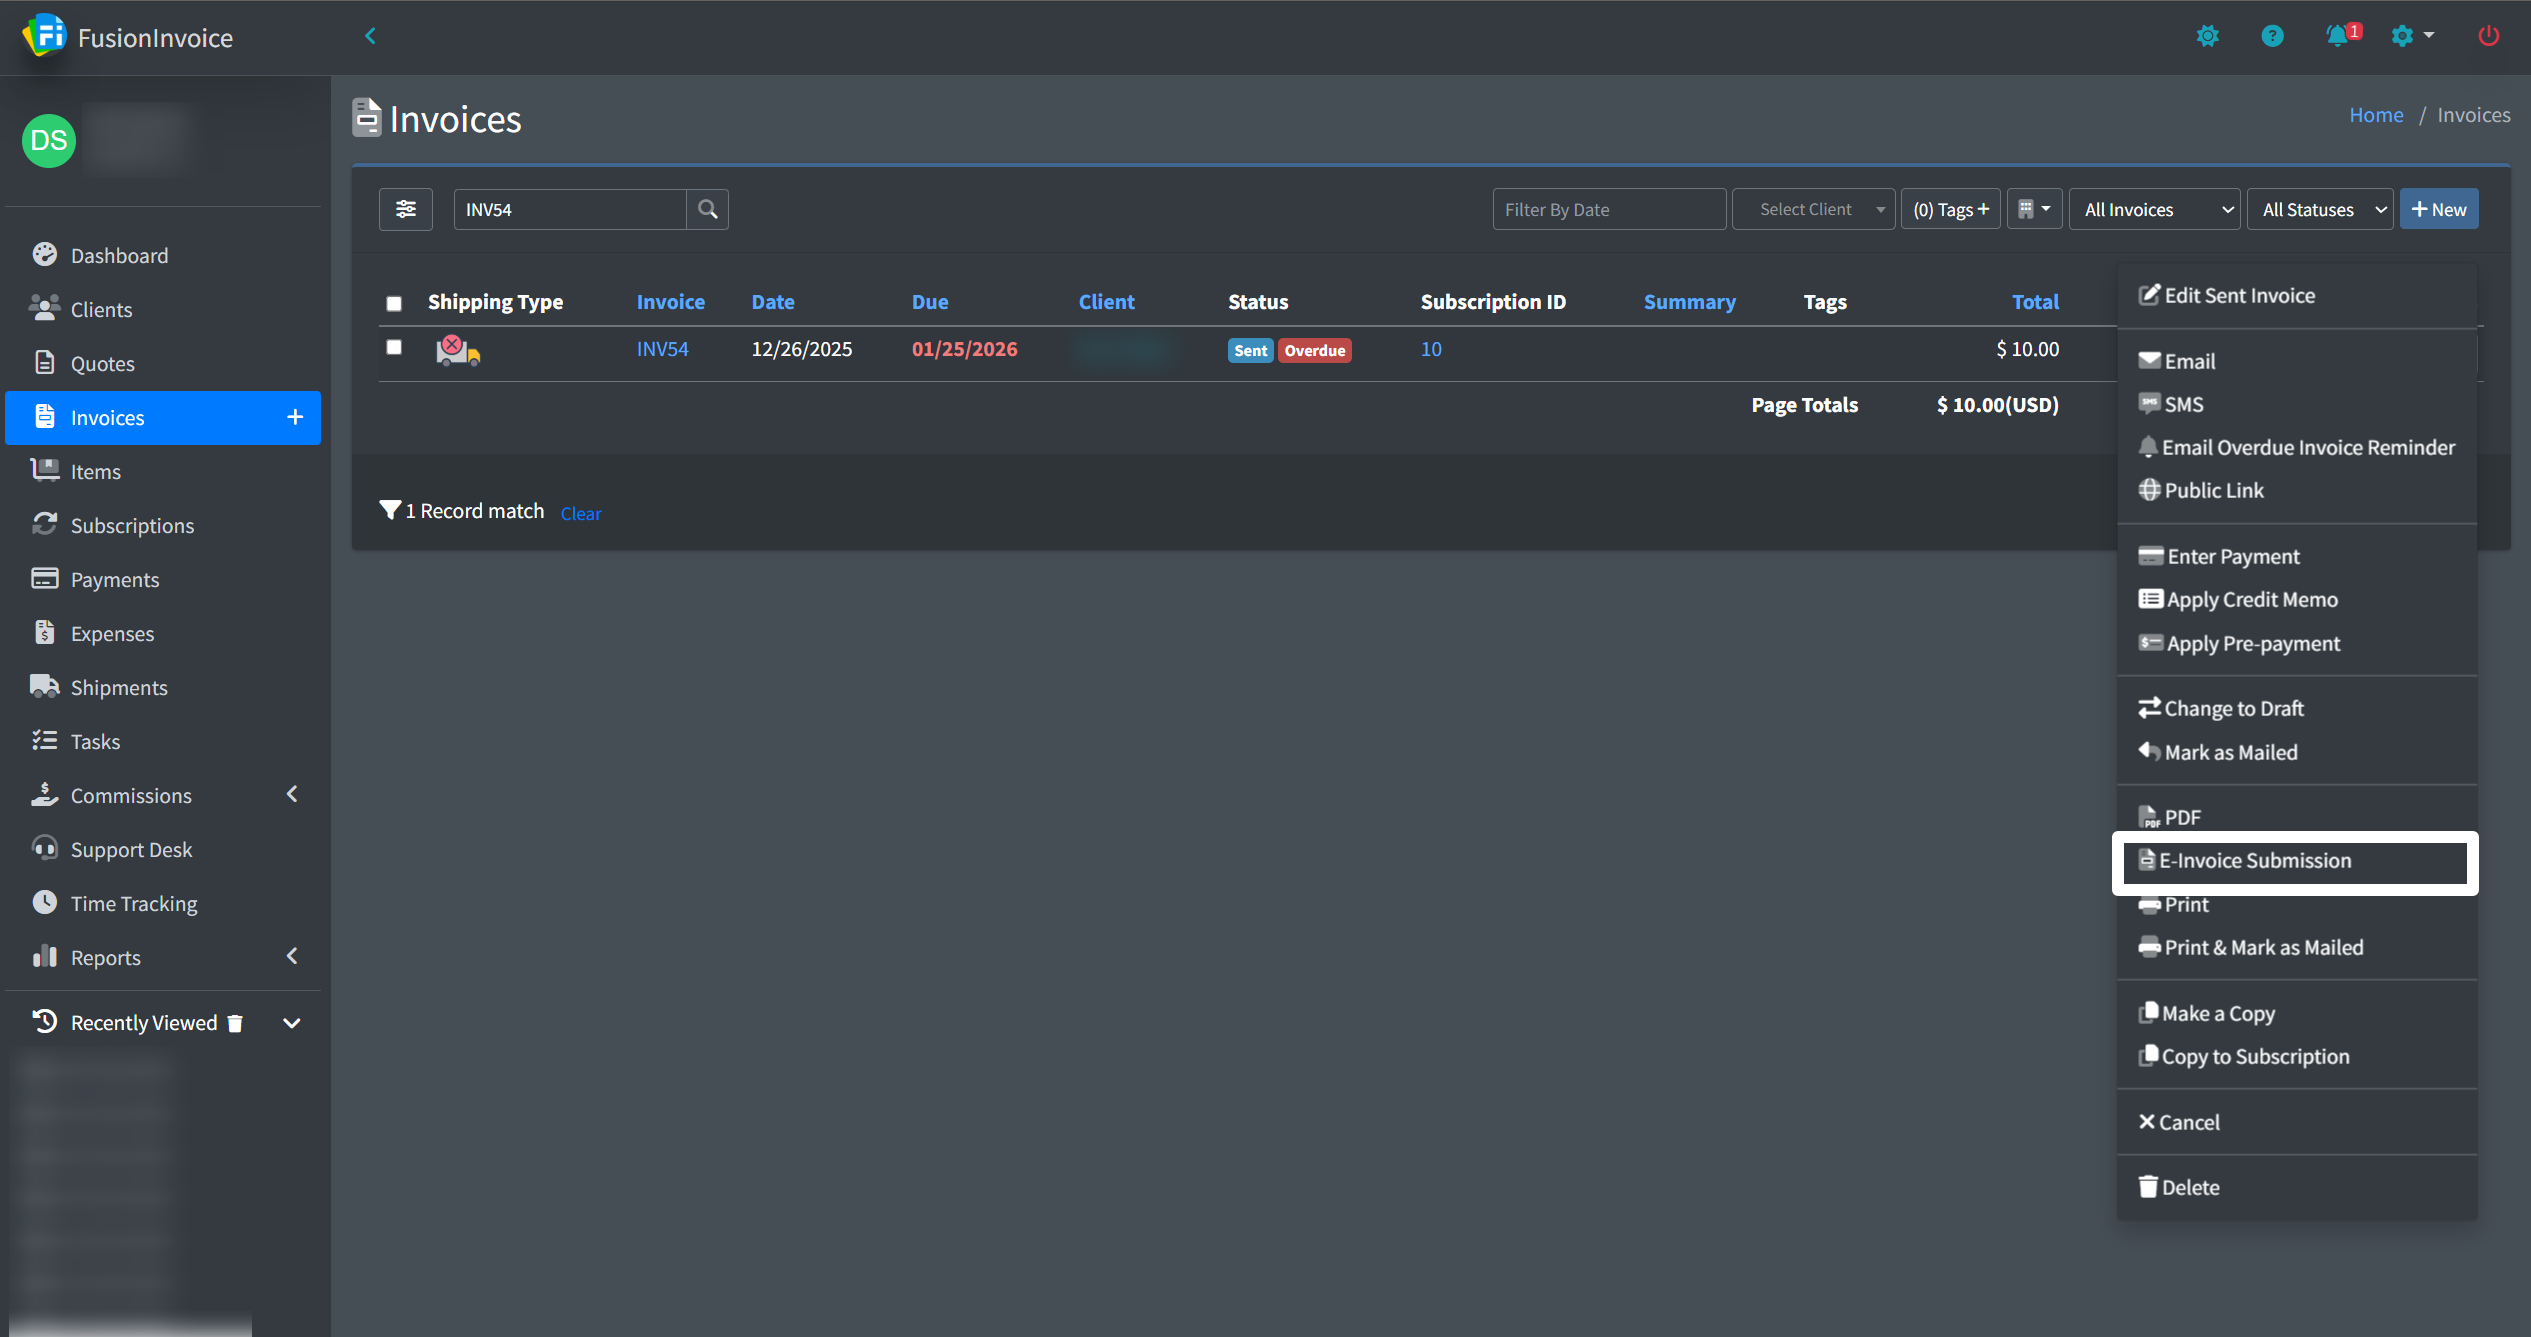
The invoice will then be processed and transmitted via the configured e-invoicing network.
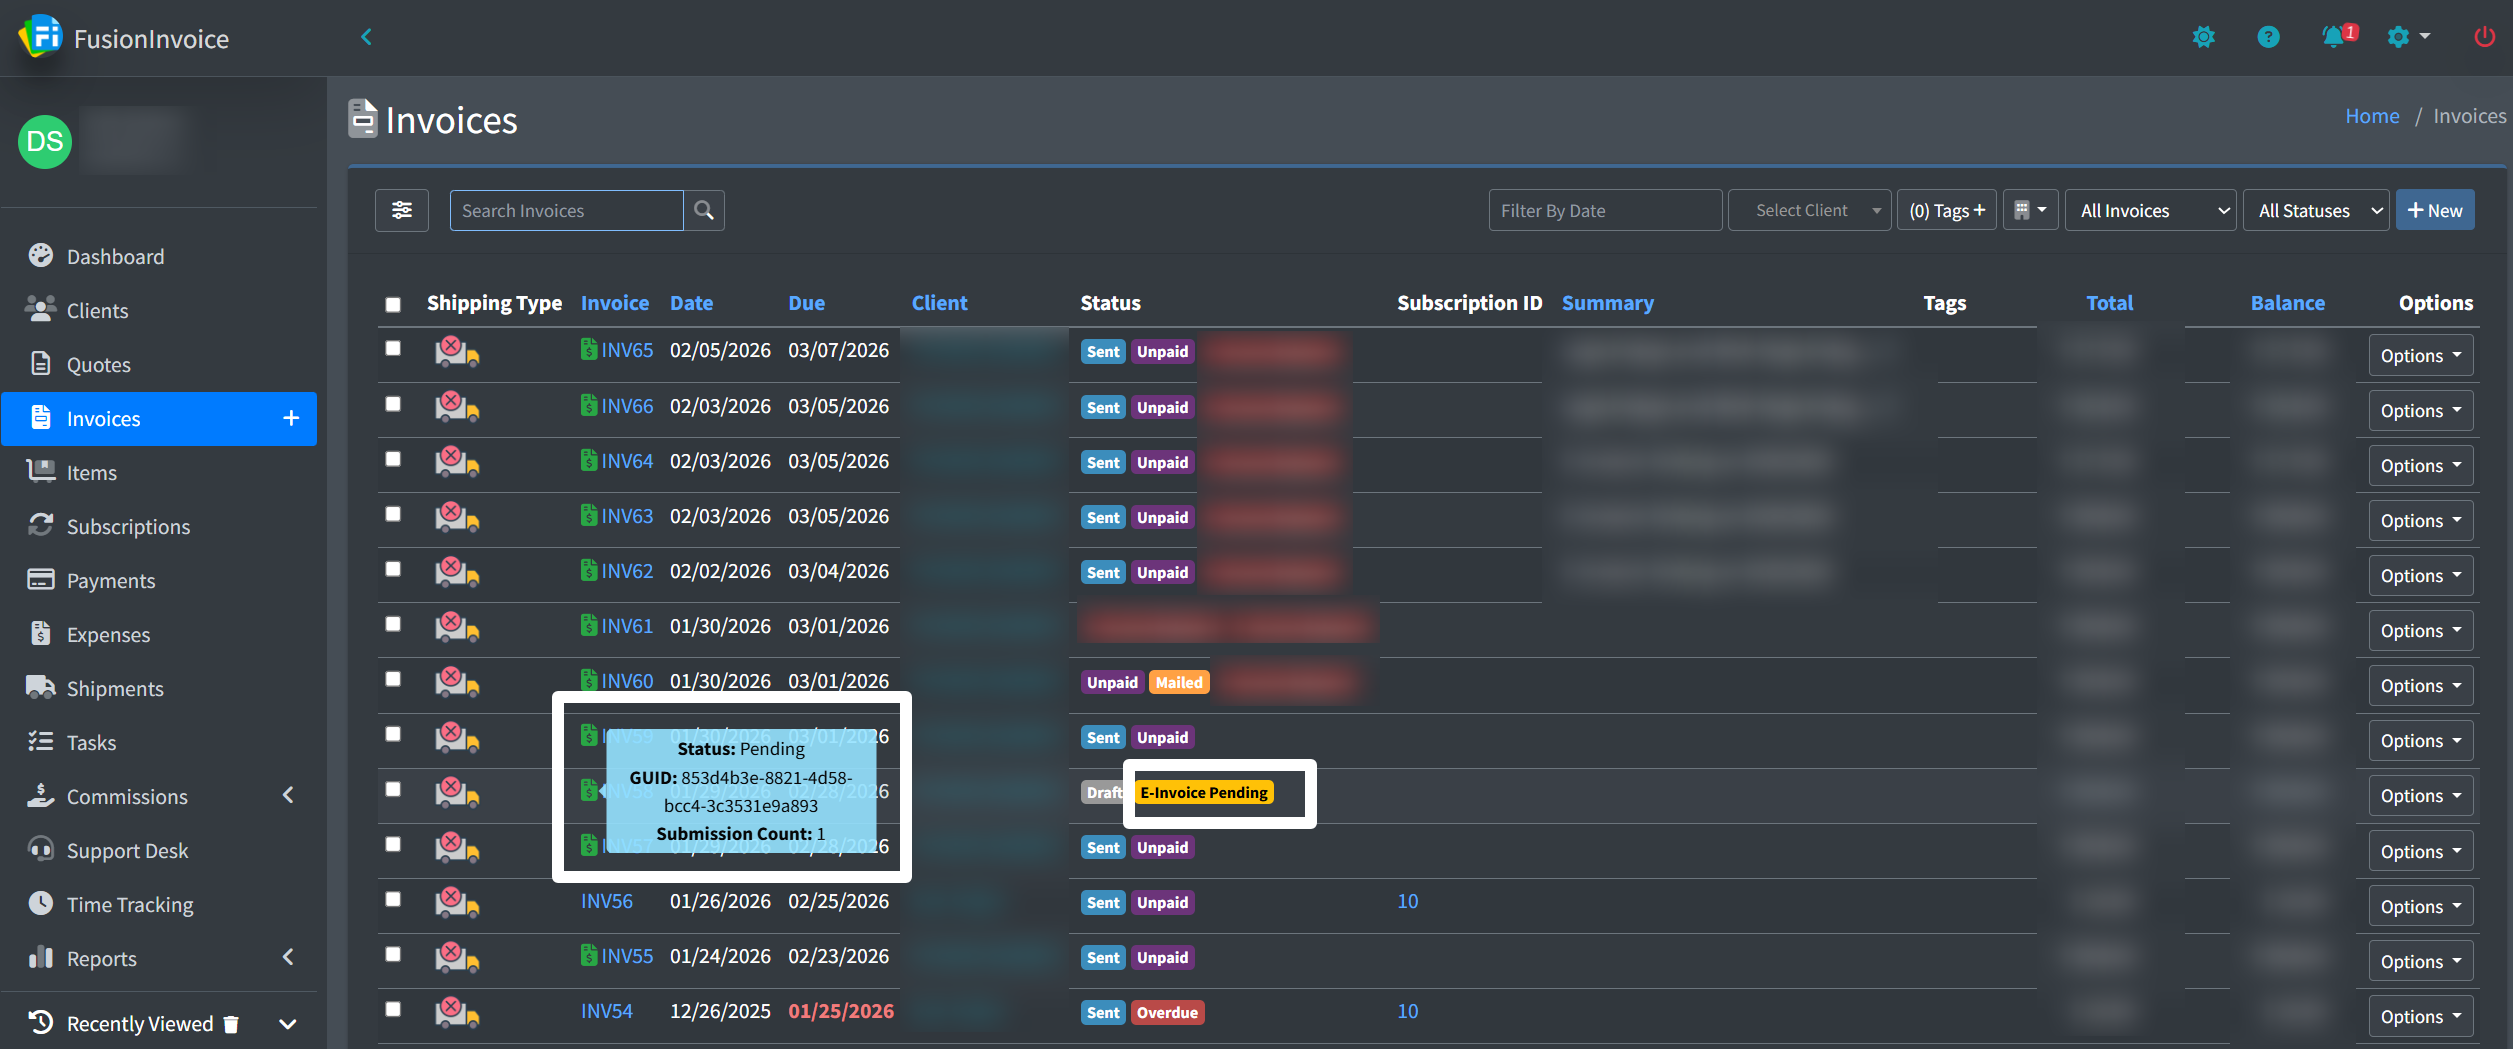
Re-Submitting an Invoice
If you need to make changes to an invoice after submission:
-
Edit the invoice as needed.
-
Return to the Options or Actions menu.
-
Select Re-Submit.
The system will transmit the updated version through the network.
Important Reminders
-
All invoice line items must have a VAT tax applied (including 0% VATZERO).
-
Your business must be approved on the PEPPOL network before sending.
-
Client VAT Schema and VAT ID are required for routing.
-
Credits are consumed when an e-invoice is processed.
-
Credits expire one year after purchase.