Creating a Quote
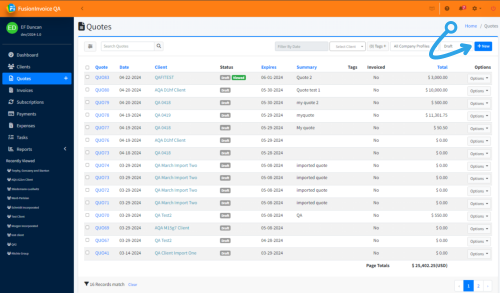
Click the Quotes menu item and press the New button.
The Create Quote screen will prompt you for the Client Name, Quote Date, Company Profile, and Document Number Scheme.
If the quote is for a new client, type the client's name in full. You will be able to edit the other details for this client record from the next screen. If the quote is for an existing client, start typing the client's name and you will be able to select your existing client from the list that appears.
The date defaults to today's date but can be changed if necessary.
The Company Profile is where the quote will pull your company name, address, phone number, and other company specific details from.
The Document Number Scheme controls the format of the number assigned to each quote.
Press Submit when done and you'll be taken to the Quote Edit screen.
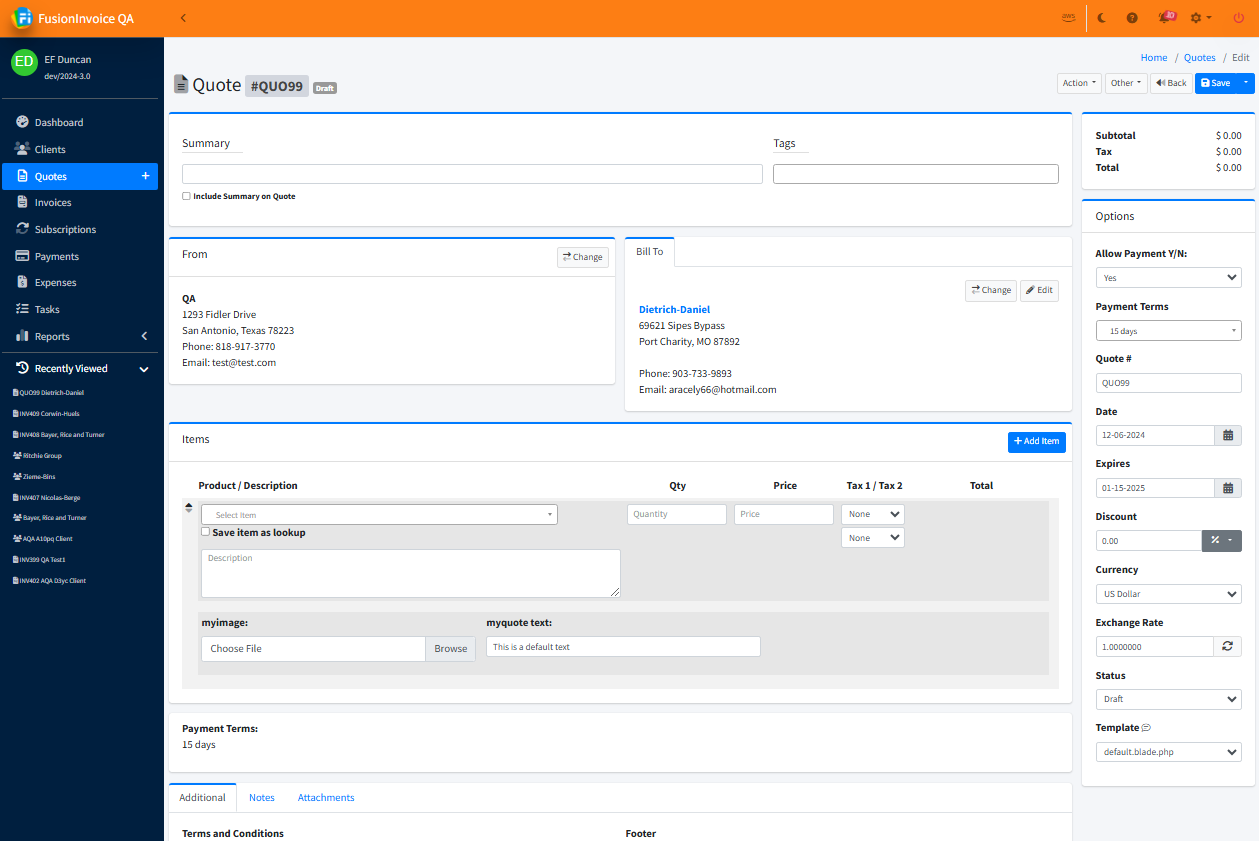
The Quote Edit screen is where you'll add line items as well as define further properties and options for your quote.
1. Summary
Entering a brief summary or description of the quote will make the quote easier to find and search for. There is also an option to add the summary to the header of the invoice.
2. From/To
The From and To areas display who the quote is issued from and who the quote is being sent to. If you created the quote with the wrong company profile selected by mistake, you can easily change that by pressing the Change button on the From area and choose the correct company profile. Similarly, if you created the quote with the wrong client selected, you can easily correct that by pressing the Change button on the To area and choose the correct client.
3. Items
This is where you'll enter each of your line items. Press the Add Item button to add additional lines for your items.
4. Additional, Notes, and Attachments
Terms and conditions as well as text to appear in the footer of your quote may be entered on the Additional tab. Defaults for these fields may be set in System Settings on the Quotes tab (default values for these fields will not appear on quotes already created).
Public or private notes may be entered on the Notes tab. Notes entered on this tab will be visible to clients viewing the quote using the public link unless they are marked as private. Clients may leave notes on a quote when viewing the quote using the public link as well.
File attachments may be uploaded to a quote on the Attachments tab. See How do I attach files to a quote? for details.
5. Options
A number of other options and values are defined in the options area.
- Quote # - This is generated according to the group selected when the quote was created.
- Date - The date the quote was issued.
- Expires - The date the price reflected on the quote expires.
- Discount - A percentage based discount can be applied to the quote.
- Currency - The currency the quote will be issued in. The default currency can be changed on both the client record and in System Settings. If the client record has a different currency than System Settings, the currency on the client record will override System Settings.
- Exchange Rate - If a currency other than your base currency is selected, the exchange rate will automatically update itself based on the current rate.
- Status - The current status of the quote. Once a quote has been emailed, the status will automatically update itself to Sent. If a client has accepted or rejected a quote from the public quote link, it will update itself to the appropriate status.
- Template - This is the template the quote will use when viewed using the public link or when generating the quote PDF. The default template can be changed on both the client record and in System Settings. If the client record has a different default template than System Settings, the client record will override System Settings. This behavior allows you use a specific template as default for most of your quotes while specifying a different template for a particular client or clients.


